Tuesday, October 28, 2014

A new FREE Tutorial! How to Create Seam Binding Fringe ~


Have you ever had an idea rolling around in your head and
FINALLY you try it and it actually WORKS??!!!

I'd been thinking about making a cardboard template that I could
wrap seam binding around BUT be able to sew it together up the middle
to create my own seam binding fringe.

1. I found some heavy duty cardboard in my box stash and cut a
5 1/2" wide x 12" long rectangle.

Then I cut out about 1 3/4" strip out of the middle but not
all the way on one end. I wanted a very tall "U" shape.

2. Pin the end of the seam binding to the cardboard on one side
and begin wrapping around the cardboard, twisting the seam binding
when you reach each side to go back around. The twist will add a bit
of dimension and fluff to the fringe.


I made a makeshift spool holder with my pin cushion and a doll needle!!


3. Continue wrapping and twisting until you almost get to the bottom
of the opening in the center of your rectangle.
Cut the seam binding even with one side and pin it to the cardboard as well.

At this point you could also add a coordinating fiber or fuzzy yarn
and wrap it around on top of the seam binding to add
even more texture to your fringe. OR maybe add some delicate lace
wrapped around on top of the seam binding!


4. Put a zipper foot on your sewing machine and begin sewing down the middle
of your wrapped cardboard. I chose to sew close to the left side because I wanted
my doubled fringe to be staggered with one layer shorter that the other layer.


5. Carefully guide the sewing machine foot over the seam binding strips,
watching out for your fingers!

Remember to forward and reverse your stitching at the beginning
and end to lock in the threads so they won't come unraveled.


6. Here is how it should look when you are finished sewing through it all.


7. Now begin sliding your seam binding off of the cardboard rectangle.
This was a little tricky for me at first because I'd kind of wound mine tight
but eventually I shimmied it off.


8. Next, fold your seam binding strip in half on the stitch line. Use the warmth
of your fingers to finger press it down. Remember, mine isn't
exactly in half because I wanted the top layer to be shorter than the back layer.
Then using a warm iron (not too hot or it will melt the seam binding)
press the top layer down along stitching line.


9. Attach to your project by sewing it on or even using Fabri-Tac glue and then trim off
any excess that you may have. If you sew it to your project, rather than
enclose it in the seam, you can sew a small strip of lace over your stitch line to hide it.
I have mine pinned to the top of the stocking I'm working on
for now because I want to play with some vintage lace layers and other elements.


So there you have it!!!
An easy way to create your very own seam binding to add to your purses,
collages, stockings, pillows or WHATEVER your heart desires.

♦ You could dampen your hands with water after applying to your project
and then scrunch it to give it wonderful old look!

♦ If you don't care for the loops, you can always cut through the
bottom of them to create a basic fringe.

♦ You could sew a line down the left side of the opening AND
down the right side of the opening and cut straight down the middle
and have DOUBLE the length too!

♦ OH and remember, you can make your cardboard rectangle whatever
size you want...make it longer to create longer sections too!
The measurements of my fringe are 3 1/2" long for the back layer
and 2" long for the top layer.

If you need seam binding, be sure to visit Jeff at Zipperstop and
tell him The Feathered Nest sent you!!!


Don't you just love it when an idea WORKS????
The stocking is still in progress...so stay tuned :)
ps.....the color of the seam binding used in this project is Croquette Beige.


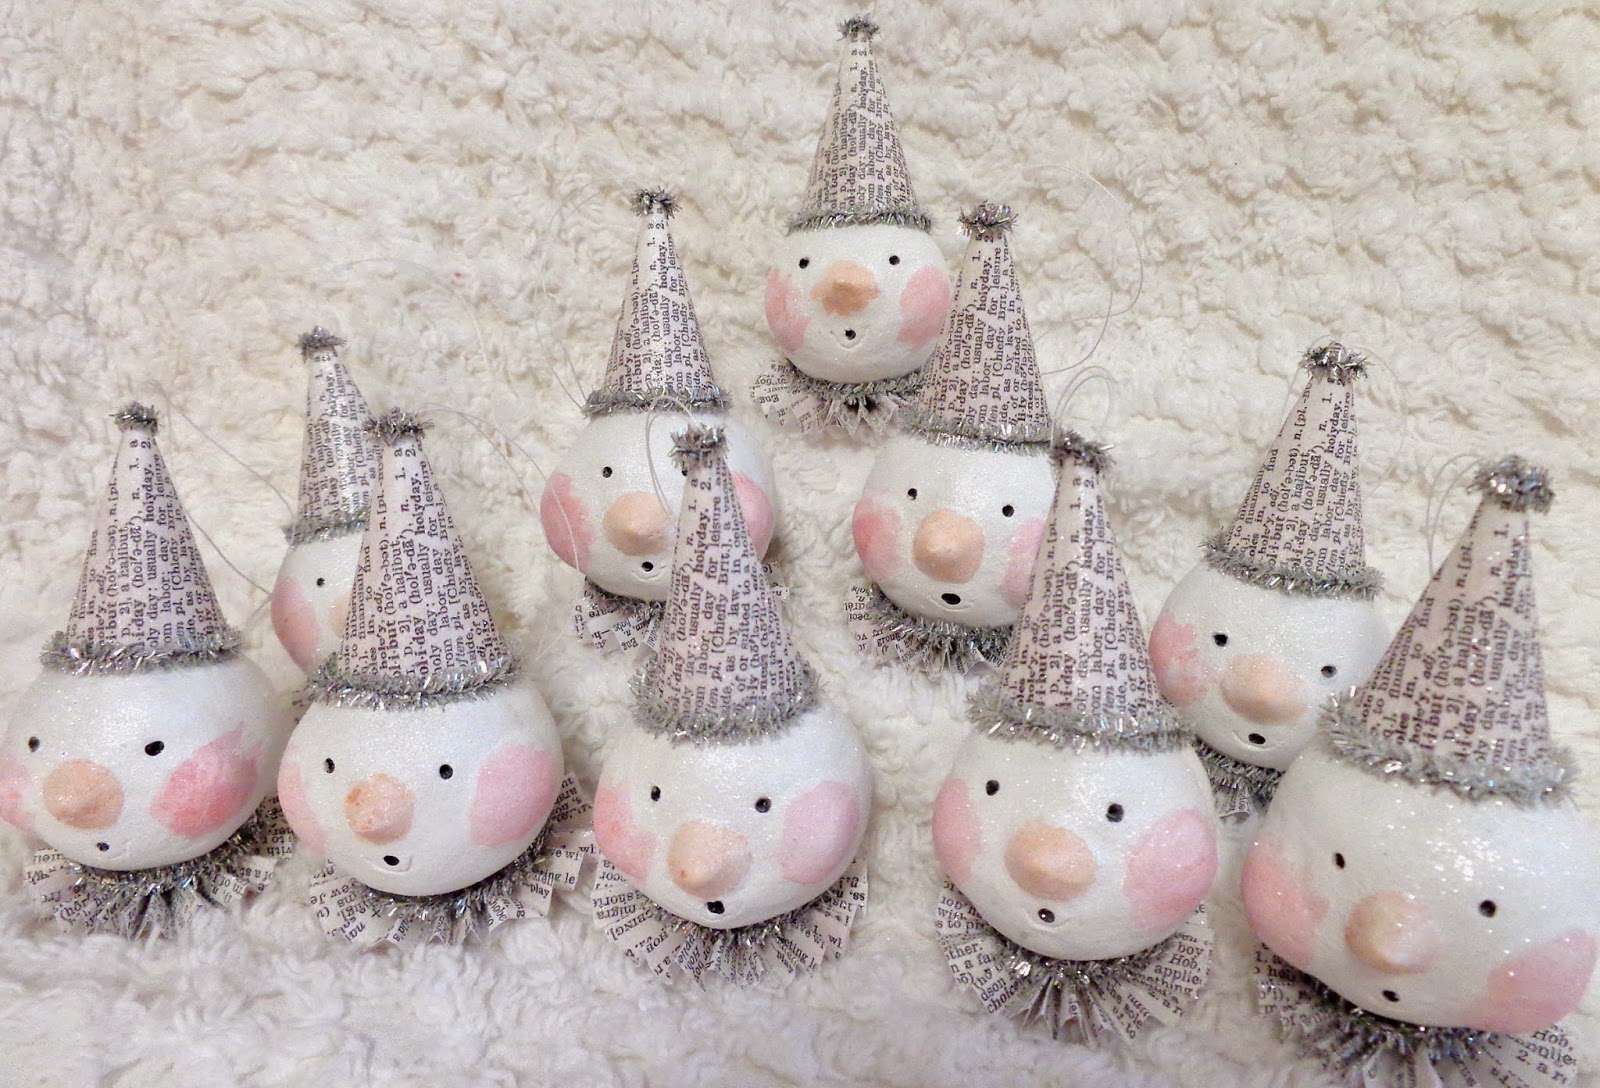
Here's glimpse at the little snowmen ornaments I made for a friend...
all finished and ready to go!!!


Wishing you a wonderful Wednesday dear friends,
hugs and love,
Dawn


Friday, October 24, 2014

A few little goodies in the works!


I promise, I have been busy...just not very busy blogging!
It seems that about this time every year I end up making some of these little guys,
my sweet snowman ornaments.

I just love them, they make me smile ~
I should have several finished and in my Etsy shop by the first of the week.
If you want to make one of your own,
I sell the tutorial with photographed instructions in the shop too!!


The above photo is just the first stage...they'll eventually look like this:


PLUS...I've created a pattern for a long, skinny stocking and have tested it out!
I'm going to add some wonderful antique laces and buttons to adorn the front.
So far, I'm really liking the shape of it....I just used muslin on the outside and the lining.
I would love for it to have an aged look when I'm finished ~ we'll see!!


I know it isn't even Halloween yet but I always start making these things
about this time of year because you and I both know,
we will blink and it will be Christmas!!!!
I'll be sure to share more photos as my projects develop too!


Thank you always for stopping by here to see what I'm up to ~
Wishing you a beautiful fall weekend dear friends,
hugs and love,
Dawn


Thursday, October 16, 2014

Change is in the air and a SALE!!


As the weather changes and begins to cool,
my thoughts always turn to the holidays!

Halloween is fast approaching and we all know
that we'll blink and it will be Thanksgiving...
we'll blink again...and Christmas will be here!!

My mind is spinning, thinking of what project to make next.
I have a few ideas for Christmas that are coming together in my mind,
now just to make them happen!!!

I'm looking through my library of images for inspiration....
here are a few to share with you:


What's on my mind??? Skinny long stockings...angel slippers...precious lambs.
We'll see what materializes!!!


*   *   *   *   *   *   *  *   *   *   *   *   *   *   *   *   *   *   *   *   *


I finally finished that big fleur-de-lis soap order!!
Using only one mold was a challenge but I found
that if I just kept at it, steady as you go...
the pile grew bigger and bigger!
They really did look so pretty all stacked up in the box ~


PLUS...
I'm having a sale in my Sewmanyroses Etsy shop
starting now through this coming Sunday night (Oct 19)!!
Just type OCTOBERSALE in the Coupon Code box when checking out
to receive 25% OFF your entire order!!!
This includes everything, tutorials and items!!!


It's time to get creative!!!!!


I hope you are doing so, so good!!!
Wishing you a beautiful fall weekend precious friends,
hugs and love,
Dawn


Saturday, October 11, 2014

A few days in the life ~


So...what's been going on around here???
Regular ol' every day things ~
washing clothes, cooking yummy dinners and
in the last few days, I've given a few hair trims!

I've cut our boys hair their whole lives and our next-to-the-youngest, Chase,
needed a trim Friday. Then, little Murray and Clara, our grandbabies, needed
a trim as well! Then their mama, Emily wanted an inverted bob...so I did it!
She ended up loving it!

I'm sorry, no pics though, I was just too tired!

All the while we have a soap order in our General Store Soap Shop
for 65 fleur de lis soaps for a special party
and guess what???
We have ONE mold!!!
So I've been pouring them constantly, popping them out,
then pouring another...
but it was a wonderful order and worth the effort.


Wishing you a wonderful day precious friends,

hugs and love,
Dawn


Tuesday, October 7, 2014

What's happening over here in my neck of the woods!


Well, when you don't see me for a while it's always because I'm busy!
I've been working on MORE pumpkins for a special order from Etsy.
She didn't like the original stems that I added so I trimmed them up
just for her!!! Still, no sale.

So now I offer this sweet set of three to you ~ the very last of the season!


PLUS!!!! We are having a fall sale in our General Store Soap Shop as well!
Simply type the word LEAVES into the Coupon Code box when checking out
to receive 20% your ENTIRE ORDER!!!!!


The VERY best part of my week so far???
Our second born son has found a precious girl and is so much in LOVE with her!!!!
This right here makes my day, my month, my YEAR!


Happy Tuesday angels ~
hugs and love,
Dawn


Friday, October 3, 2014

Sharing the beauty ~


I visited my parents a few years ago in October in North Georgia....
Fall is a magical time of year and it is ESPECIALLY
wonderful in the mountains of North Georgia!!!!

So...I will share past photos to inspire you,
they always inspire me!!!

Here's an older post for you to see the wonderful color!

* * * * * * * * * * * * * * * * * * * * * * * * * * * * * * * * *

It truly was...absolutely, breathtakingly beautiful ~
My parents live in the north Georgia mountains
and it was so good to see them!!
We left Friday afternoon around 3:00 pm
hoping to get ahead of the awful Friday afternoon traffic.
No such luck.
What should have been a 3 hour trip
turned into a 5 hours!
But it was fine, because this is what we awoke to Saturday morn....

The view behind my parent's house standing on their deck ~


We headed out early Saturday morning
so we could squeeze in as much fun as we could!
These are some of the photos I took ~
I hope you don't feel like your at the neighbor's house
looking at vacation slides!!


Do you think Heaven will look like what you love??
If so....Heaven will look like this to me ~

We went junkin' as there were tons of yard sales all
around the town of Hiawassee ~ They were
taking advantage of all the leaf-lookers that were visiting.
I found some wonderful
goodies that I'll share later on!


* * * * * * * * * * * * * * * * * * * * * *


I just love fall so very much!!!

Happy Friday angels ~
hugs and love,
Dawn


Labels

Related Posts Plugin for WordPress, Blogger...